Updated on 2026-07-21 / iPhone Tips
Most users say iOS 27 feels smoother and more stable than iOS 26 — but if it's not working out for you, here's how to go back to iOS 26 safely, without iTunes or complicated steps.
Part 1. Should You Go Back to iOS 26?
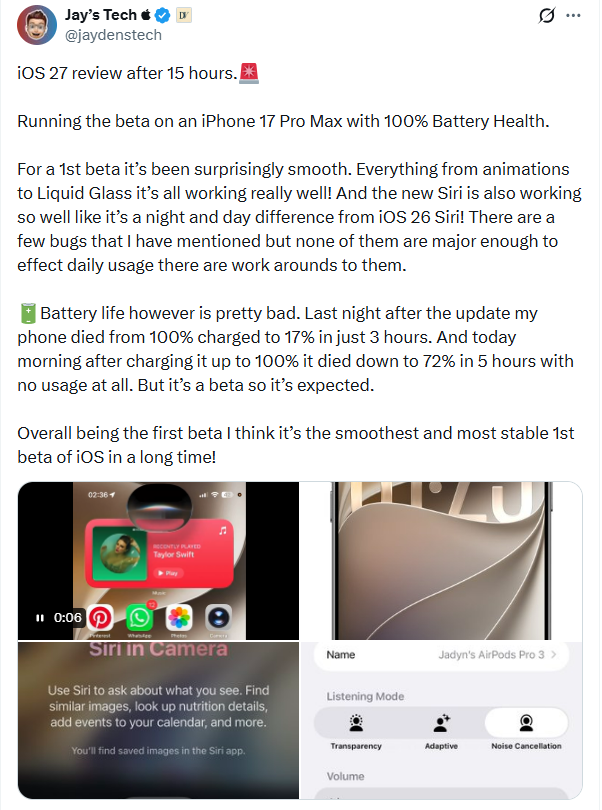
Unlike previous iOS updates, iOS 27 has actually received a lot of positive early feedback. On X and Reddit, many users running the first beta report that it feels smoother and more stable than iOS 26, with one user noting that animations and the new Siri felt like "a night and day difference" compared to iOS 26.
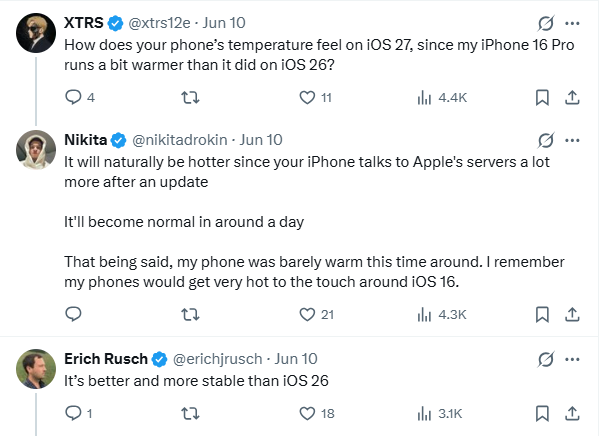
Overheating concerns also seem less common this time around. Several users mentioned their iPhones ran only slightly warmer right after the update — a normal effect of background syncing with Apple's servers — and returned to normal within a day, unlike the more noticeable heat issues some experienced on iOS 16.
So if iOS 27 is running well for most people, why would anyone want to go back to iOS 26?
The truth is, going back isn't only about escaping bugs. Even with mostly positive Beta 1 feedback, a few users have run into rough edges — like random Bluetooth-related network drops or iPhone Mirroring disconnects on Mac. Not widespread, but disruptive if you hit them.
Beyond bugs, common reasons for going back include:
-
A specific app or accessory isn't yet compatible with iOS 27
-
Battery life dropped noticeably (typical for early betas)
-
You installed the beta just to test it, and now want a stable daily driver again
-
You prefer the previous UI or workflow
-
Your workplace or organization hasn't approved iOS 27 yet
If any of these apply to you, this guide will show you how to go back to iOS 26 safely — without iTunes, factory reset headaches, or complicated technical steps.
Part 2. What to Do Before Downgrading iOS 27
1. Check If iOS 26 Is Still Signed
Apple only allows downgrades to versions that are still officially signed. As of June 12, iOS 26.6 (beta) and iOS 26.5 are still signed and available for downgrade.
Signing windows can close at any time, you can check the real-time iOS signing status before you proceed.
Apple only allows downgrades to versions that are still officially signed. If Apple stops signing iOS 26, normal downgrade methods will no longer work.
2. Back Up Your iPhone
Even if you use a no-data-loss method, creating a backup is still bly recommended.
Back up with iCloud
Go to:
1. Settings → Your Name → iCloud → iCloud Backup → Back Up Now
2. Back up with a computer
3. Connect your iPhone and click "Back Up Now" in Finder or Apple Devices.
Note: Backups created on newer iOS versions sometimes cannot fully restore to older systems.
3. Turn Off Find My iPhone
Go to:
1. Settings → Your Name → Find My → Find My iPhone
2. Turn it off and enter your Apple ID password.
4. Charge Your iPhone
Keep your battery above 60% before starting.
A shutdown during downgrade may cause system issues or downgrade failure.
5. Use Stable Wi-Fi
iOS firmware files are very large.
Weak internet connections may interrupt downloads or corrupt firmware files.
Part 3. How to Go Back to iOS 26 Without iTunes
Method 1. Restore a Stable iPhone Experience with ReiBoot [Recommended]
Whether you're dealing with a specific bug or simply want to switch back to a fully-tested version, Tenorshare ReiBoot is the easiest and safest way to go back to iOS 26.
Unlike traditional iTunes restore methods, ReiBoot is designed for normal iPhone users who simply want their phone working properly again — without dealing with complicated IPSW files, recovery mode loops, or factory reset problems.
It helps you:
-
Go back to iOS 26 in one click
-
Avoid complicated iTunes restore steps
-
Fix many iOS issues at the same time
-
Restore smoother system performance
Please note that downgrade failures may still happen in some situations, such as:
-
Apple no longer signing iOS 26
-
Unstable USB connections
-
Corrupted beta system files
-
Interrupted firmware downloads
Here is how to downgrade to iOS 26 [Video guide & step-by-step guide]:
-
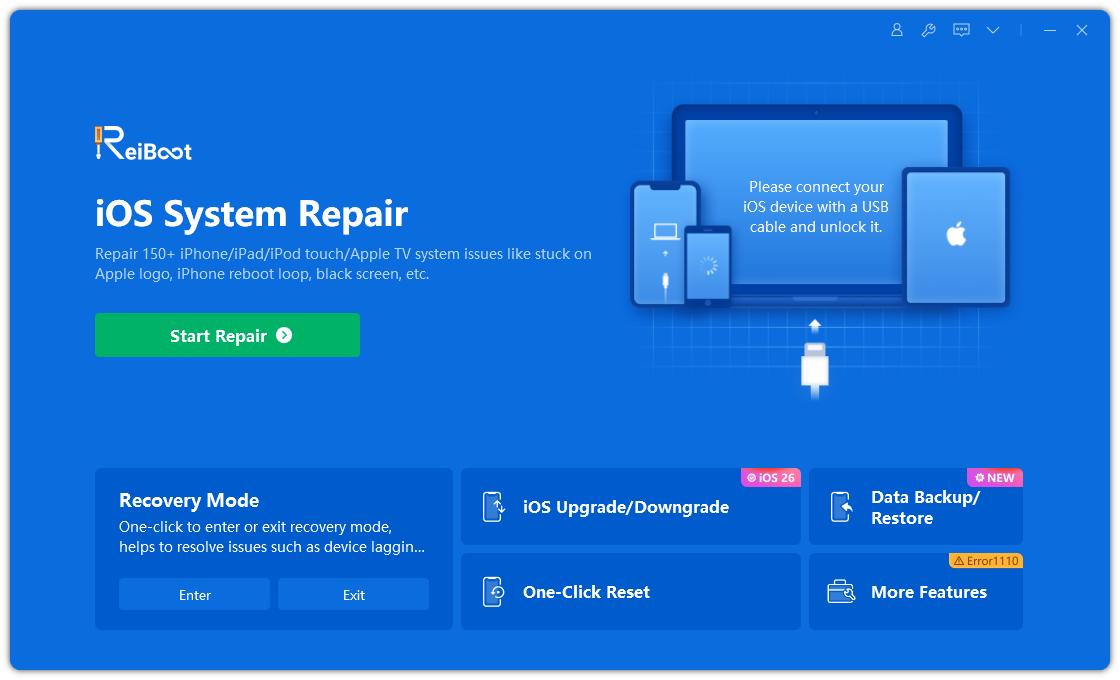
Step 1: Download and install Tenorshare ReiBoot on your Mac or Windows PC. Open it, then connect your iPhone using a USB cable. Once your device is detected, click iOS Upgrade/Downgrade on the main screen.
-
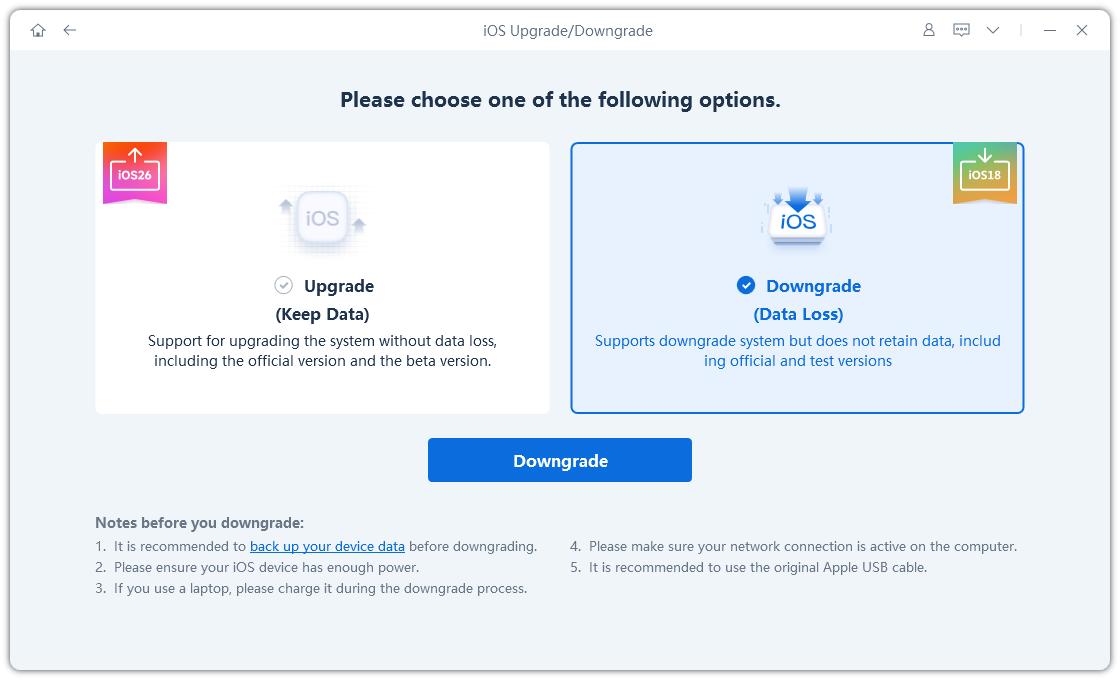
Step 2: Click on Downgrade when the options appear. The tool will automatically check your device and show available iOS versions that are still signed by Apple.
-
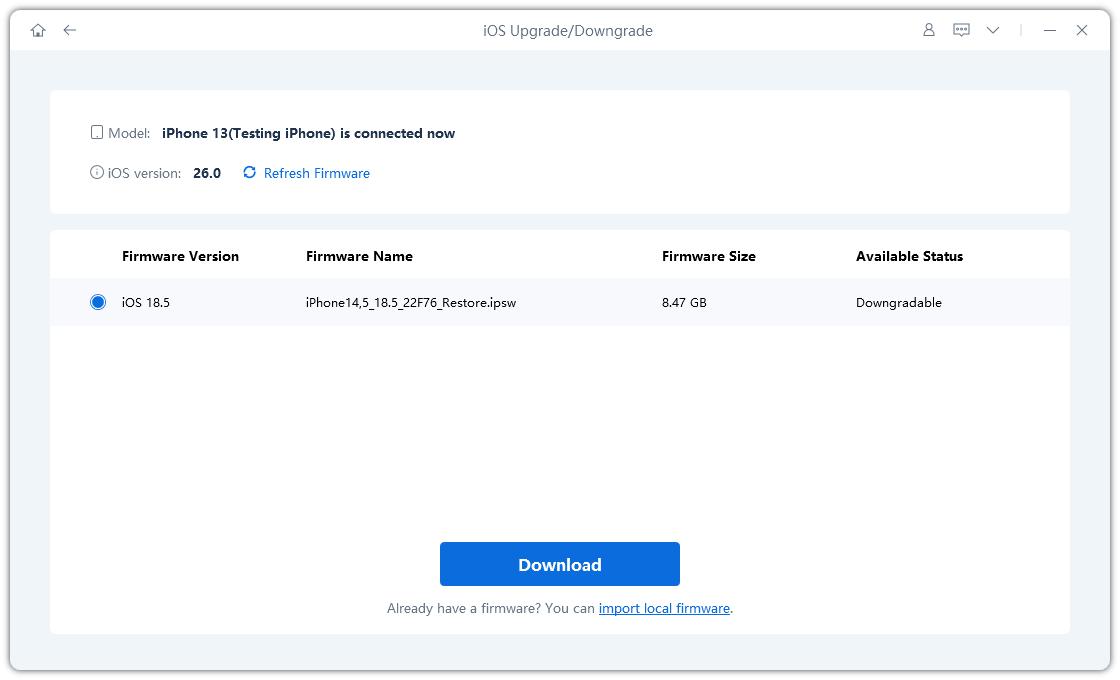
Step 3: Select iOS 26 from the list and click Download. Wait for the firmware to finish downloading. Keep your internet stable during this step.
-
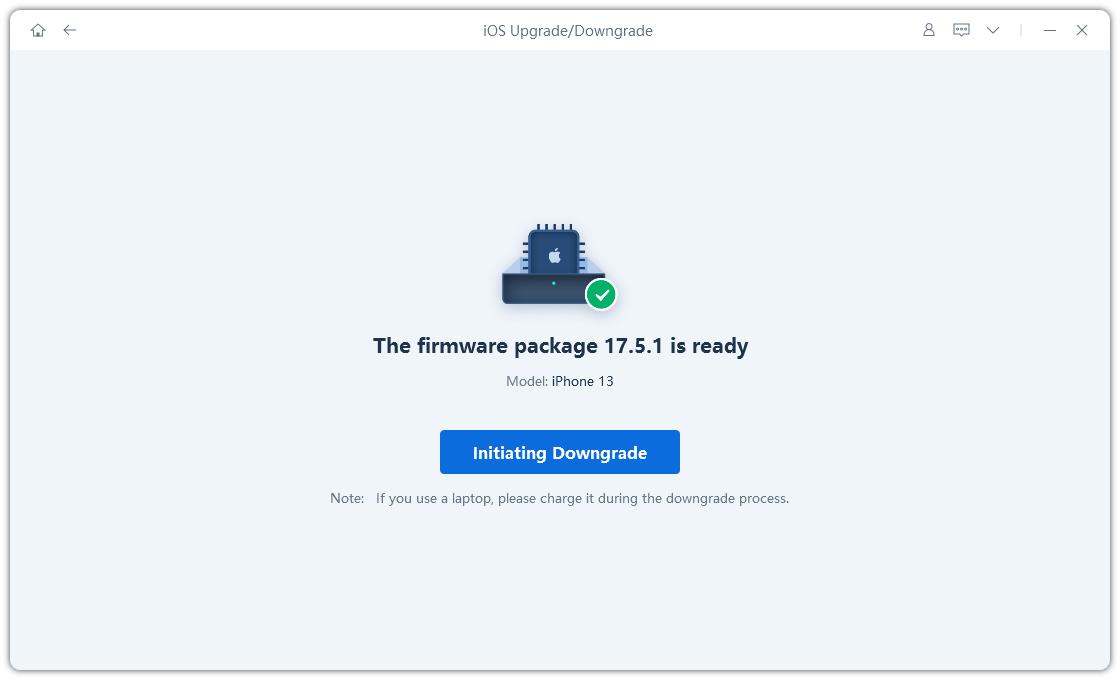
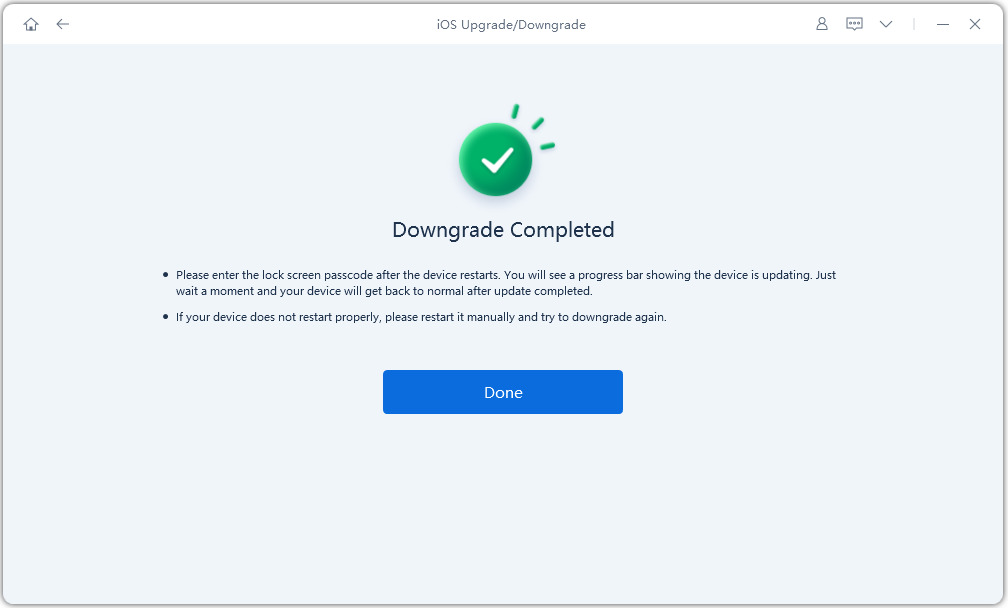
Step 4: After the download completes, click Start Downgrade. The process will begin and your iPhone may restart a few times. Do not disconnect the device.
-
Step 5: Once done, your iPhone will reboot into iOS 26. Your data will still be there, and your device will be ready to use again.
Method 2. Go Back to iOS 26 with Finder or iTunes
Apple also allows users to manually downgrade using Finder (Mac) or iTunes / Apple Devices (Windows).
However, this method is more difficult and usually erases your iPhone completely.
It is better suited for advanced users.
Limitations of the Official Apple Method
-
Requires a computer and USB cable
-
Much more complicated for beginners
-
Usually wipes all iPhone data
-
Restore errors are common
-
Recovery Mode may fail during installation
How to Downgrade Using Finder or iTunes
-
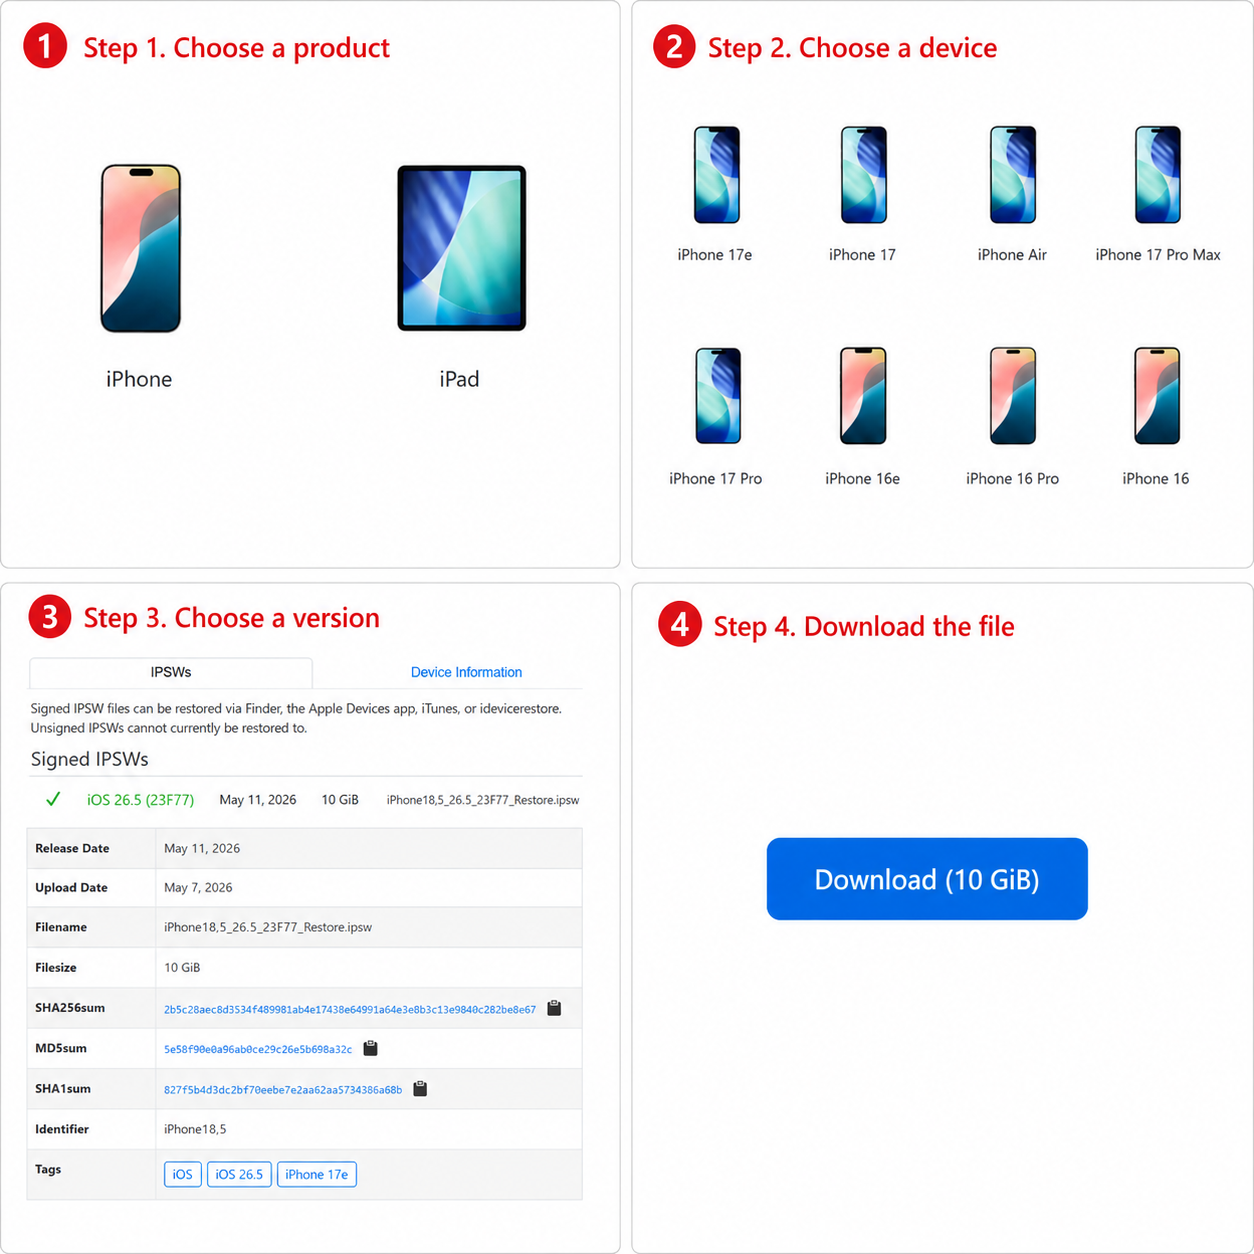
Step 1: Download the Correct IPSW File
Visit IPSW.me and download the signed iOS 26 firmware for your iPhone model.
-
Step 2: Connect Your iPhone
Use a USB cable to connect your iPhone to your Mac or PC.
Open Finder or iTunes.
-
Step 3: Enter Recovery Mode
Put your iPhone into Recovery Mode.
Your computer should detect a device needing restore.
-
Step 4: Select the IPSW File
Hold:
-
Option key on Mac
-
Shift key on Windows
Then click Restore iPhone.
Choose the iOS 26 IPSW file you downloaded earlier.
-
-
Step 5: Wait for the Restore Process
Your iPhone will restart several times.
Keep it connected until installation completes.
-
Step 6: Set Up Your iPhone Again
After downgrade finishes, you can:
-
Restore an older backup
-
Or set up the iPhone as new
For best performance, many users prefer a fresh setup.
-
Part 4. How to Restore Your Data After iOS 27 Downgrade
After successfully downgrading from iOS 27 to iOS 26, the next step is restoring your data. The available recovery options depend on the type of backup you have.
Apple only allows backups to be restored to the same iOS version or a newer version, which means an iOS 27 backup typically cannot be restored directly to iOS 26.
Option 1: Restore from a Pre-Beta iOS 26.5 Backup (Recommended)
If you created a backup before installing iOS 27, restoring your data is straightforward:
- Complete the iOS 26.5 downgrade process.
- On the Apps & Data screen, select Restore from iCloud Backup or Restore from Mac or PC.
- Choose the backup created while your device was running iOS 26.
- Wait for the restore process to finish.
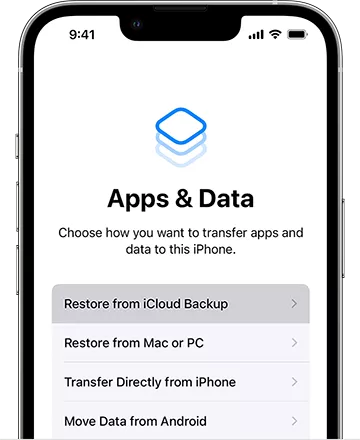
This method restores your apps, settings, messages, photos, and most personal data exactly as they existed before upgrading to the beta.
Option 2: Recover Data Through iCloud Sync
If you don't have a compatible backup, you can still recover data that was synced to iCloud:
- Photos
- Contacts
- Calendars
- Notes
- Reminders
- Safari bookmarks
- Passwords (iCloud Keychain)
- Messages (if Messages in iCloud was enabled)
Simply sign in with your Apple ID during setup and allow iCloud to resync your information. Depending on your internet connection and data size, this may take several hours.
Option 3: Restore an Edited iOS 27 Backup (Advanced Workaround)
If you don't have a pre-beta backup, some users in the iOS beta community have reported success restoring their data by modifying the backup version information before the restore process.
This workaround is not officially supported by Apple, but it has helped users preserve photos, messages, app data, and settings after downgrading.
Follow these steps:
Before downgrading, create an encrypted local backup of your iPhone using Finder (Mac) or iTunes/Apple Devices (Windows). Make sure you remember the backup password.
Downgrade your iPhone from iOS 27 to iOS 26.5 using Finder or iTunes.
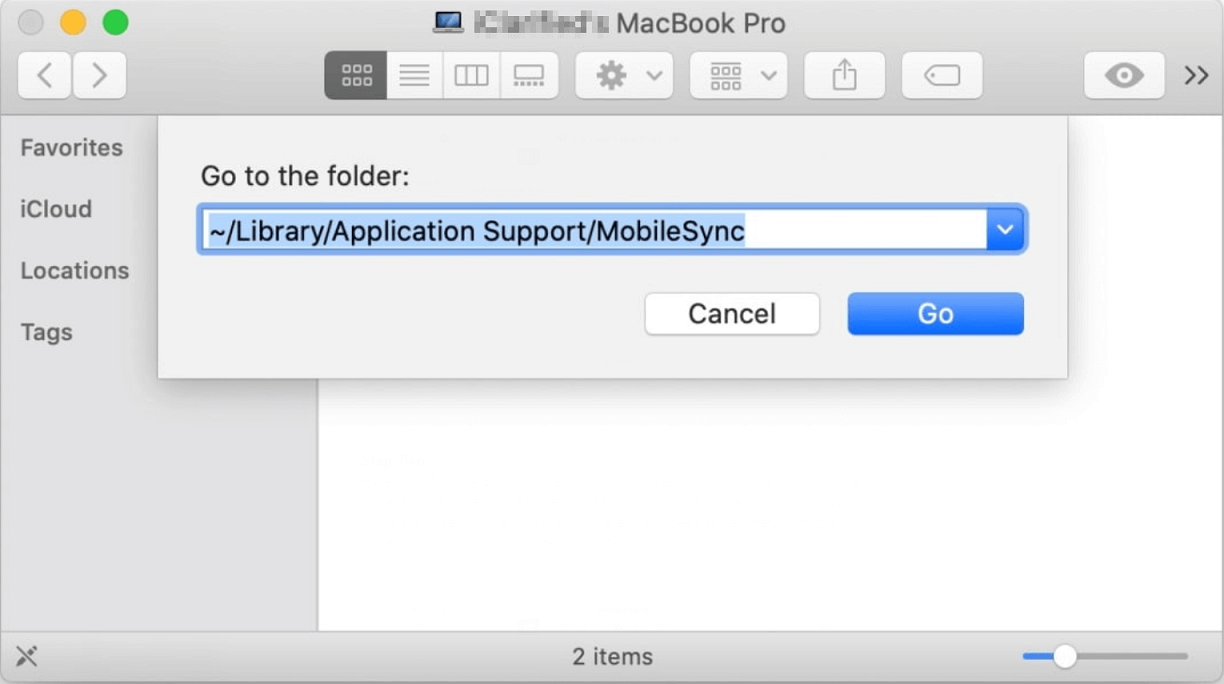
After the downgrade is complete, locate your backup folder:
- macOS:
~/Library/Application Support/MobileSync/Backup/ - Windows:
C:\Users\[Username]\AppData\Roaming\Apple Computer\MobileSync\Backup\
- macOS:
Open the folder that corresponds to your most recent backup.
Find the file named Info.plist and open it with a text editor such as TextEdit, Notepad, or VS Code.
Search for the entry labeled Product Version.
Change the version number from 27.x (for example, 27.0 or 27.1) to 26.5.
Save the edited Info.plist file.
Connect your downgraded iPhone to your computer and open Finder or iTunes.
Select Restore Backup, choose the edited backup, and begin the restore process.
Wait for the restore to finish and allow the device to restart. Depending on the size of the backup, this may take some time.
Many users report that this method successfully restores most personal data, including messages, photos, app settings, passwords, and Health data when the backup was encrypted.
Important LimitationsImportant Limitations
Because this workaround bypasses Apple's normal compatibility checks, results may vary. Some users have reported:
- App login issues
- Missing call history
- Apple Watch pairing problems
- Health data inconsistencies
- Certain apps requiring reconfiguration
For this reason, it's bly recommended to keep a copy of the original backup before making any changes.
Frequently Asked Questions from Users Who Downgraded from iOS 27
Q1: I changed the Product Version in Info.plist, but the backup still won't restore. What should I do?
The Info.plist workaround doesn't work in every case. If Finder or iTunes still reports a restore error, possible causes include:
- The backup is corrupted.
- The backup was not created as an encrypted backup.
- Additional version checks are failing.
- Some backup files were modified incorrectly.
If possible, try restoring from the original backup copy or create a new backup before attempting the downgrade again.
Q2: I'm getting Error 53 while restoring or downgrading. How can I fix it?
Error 53 is usually related to communication issues between your device and the computer, firmware installation problems, or hardware-related issues.
Try the following:
- Update Finder or iTunes to the latest version.
- Use a different USB cable or USB port.
- Put the device into Recovery Mode or DFU Mode and try again.
- Download a fresh IPSW file instead of reusing the existing one.
If Error 53 persists even after restoring in DFU Mode, hardware diagnostics may be required.
Q3: The IPSW file won't install and says there isn't enough storage. Why?
Even if your iPhone storage doesn't appear full, iOS requires additional temporary space during installation and restore processes.
Possible fixes include:
- Removing large apps or media files.
- Restarting the device and trying again.
- Using a computer-based restore instead of an on-device update.
- Downloading the IPSW file again in case the original file is incomplete or corrupted.
Q4: Is an iOS 27 backup compatible with older iOS versions?
Officially, no.
Apple only supports restoring backups to the same iOS version or a newer version. An iOS 27 backup generally cannot be restored directly to iOS 26.5.
Some advanced users have successfully modified the backup's version information and restored most of their data, but this workaround is not guaranteed to work and is not supported by Apple.
Q5: My backup is larger than the available storage on my iPhone. Can I still recover my data?
If the backup size exceeds the available device storage, a full restore may fail.
In this situation:
- Do not modify or overwrite the original backup.
- Create a separate copy before making any changes.
- Prioritize extracting important data such as photos, videos, notes, and contacts.
- Avoid deleting files directly from the backup folder unless you fully understand the backup structure.
If backup database files such as Manifest.db are missing or damaged, the backup may no longer be restorable. Data extraction tools may still be able to recover individual items, but a complete device restore becomes much more difficult.
Q6: What's the biggest lesson from users who downgraded successfully?
The most common recommendation is simple:
Always create an encrypted backup before installing any beta version of iOS.
Users who had a pre-beta backup were generally able to downgrade and restore without major issues. Most of the serious data-loss stories came from users who upgraded first and worried about backups later.