
Updated on 2024-08-02 / iPhone Tips
In iOS 16, you will see several improvements and features, and iCloud Shared Library is one of them. This new iCloud Photo functionality is known as the iCloud Photo Library. In this feature, you will be able to share a photo library with your friends and family. Take a photo, and it will be saved in the library automatically. You can also create this shared library and then invite anyone with an Apple device to view the photos, contribute photos to the library, and edit the photos in it. Thus, you can share all the photos in one place.
However, some users have an error joining Shared Library after iOS 16 upgrade. After hours of loading, it will show the error message. This might be annoying if you’re trying to access your photos and don’t know what to do about that.
The Causes of Unable to Shared Photos Library
Upgrades usually result in bugs and issues; however, you can troubleshoot by checking some of the following factors that may cause this problem.
- Your iPhone is connected to an unstable internet connection, or the connection is lost.
- Your iPhone battery is low.
- The photos are shared in iCloud, but your iPhone is not connected to iCloud.
How to Fix iOS 16 iCloud Shared Photo Library Error
Way 1. Restart Your iPhone
When dealing with problems like being Unable to Join Shared Library, one of the first things you should try is to force restart your iPhone. It could possibly resolve the issue if your iPhone is experiencing any bugs or issues.
Please note that different iPhone models have different ways of force restarting. Here’s how you can do it for different models.
Here’s how you can do it on different iPhones.
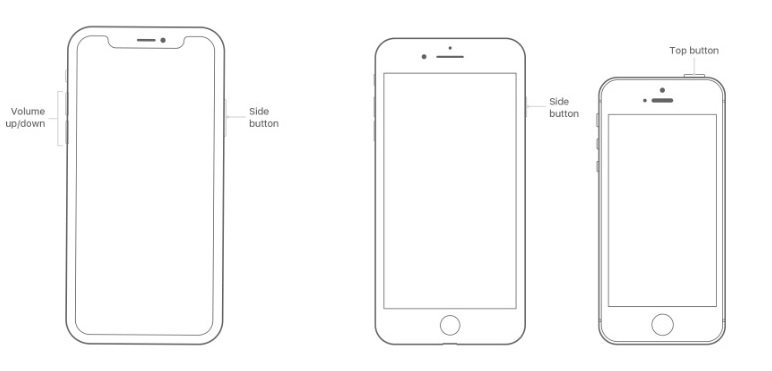
- For iPhone 8 and later models, first of all, you need to simultaneously press the “Volume Up” button and the “Volume Down” button. Now, press and hold the power button on your iPhone’s side until your screen goes off. After that, the Apple logo will appear on your screen, and it will get restarted.
- For iPhone 7 and iPhone 7 Plus, you need to press and hold the “Sleep/Wake” button. You can find this button on the right side of your iPhone. Hold it and press the “Volume Down” button simultaneously until the Apple logo appears on your screen.
- For the iPhone 6s and earlier, you need to press and hold the “Home” button and the “Power” button. Keep them pressed until the Apple logo appears on your screen.
Way 2. Turn the iCloud Photo Library OFF and ON
If restarting wouldn’t fix the issue, try turning the iCloud Photo Library OFF and ON. For that, follow the below steps.
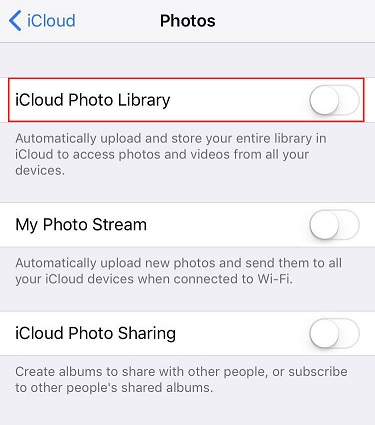
- Open the Settings app on your device.
Now Tap on your name and then tap on iCloud in the options.
There you will see the toggle for iCloud Photos. Set it OFF and then ON again.
Way 3. Fix Photo Sharing Error with ReiBoot
If you feel that this can be a software issue then this method is the one that can help you find your way out of this problem.
You only have to follow the instructions below by downloading the Tenorshare Reiboot software on your PC or Mac and your issue will be resolved within seconds. This software is efficient and effective with a high success rate.
Here are the steps that you need to follow to fix Photo Sharing Error with ReiBoot.
Visit the Tenorshare Reiboot website and download the Reiboot program for PC or Mac.
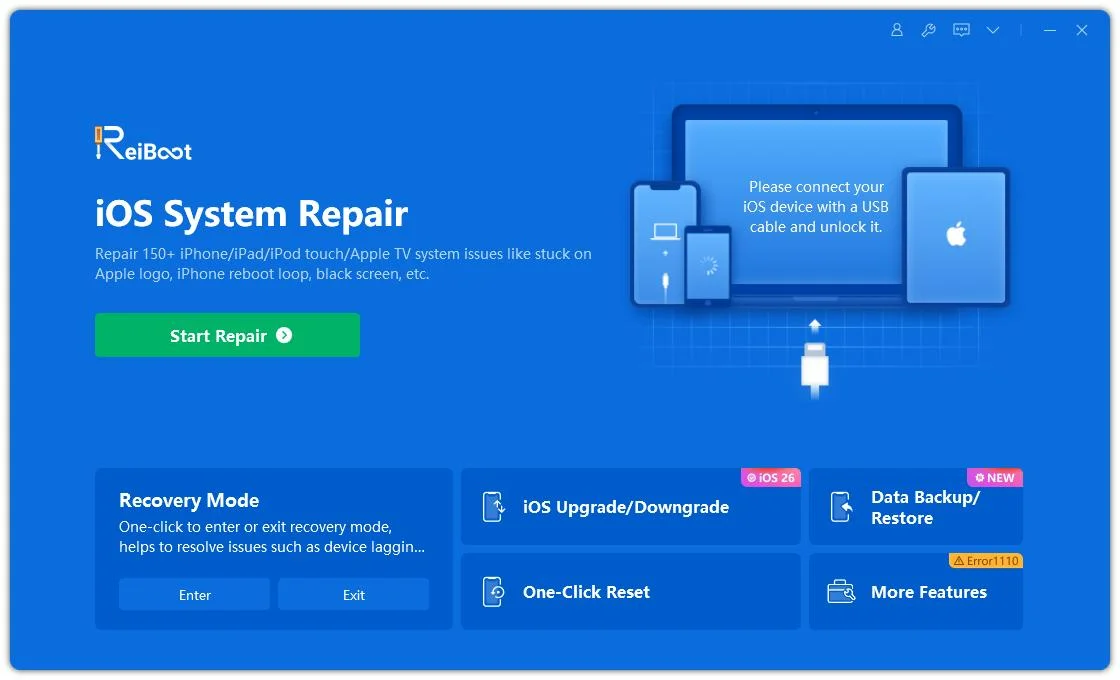
Launch Reiboot on your computer and connect your iPhone to it.
Once the device has been identified, press the start button.
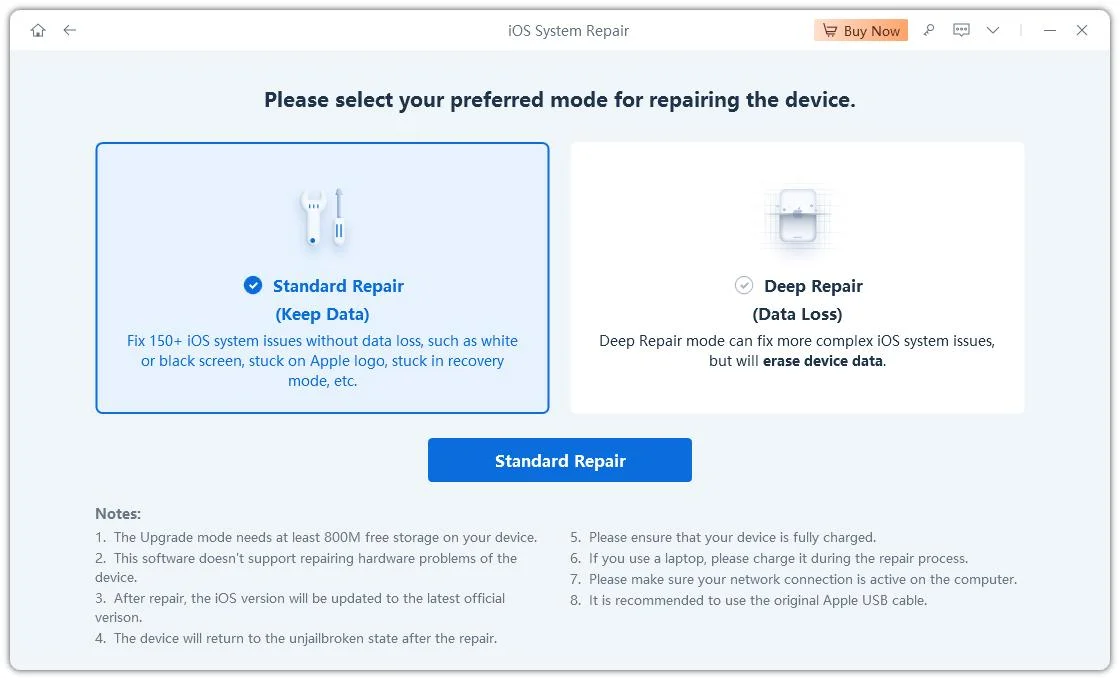
You have the option of performing Standard Repair or Deep Repair. Although deep repair has a high success probability, it will result in data loss. Click Standard Repair.
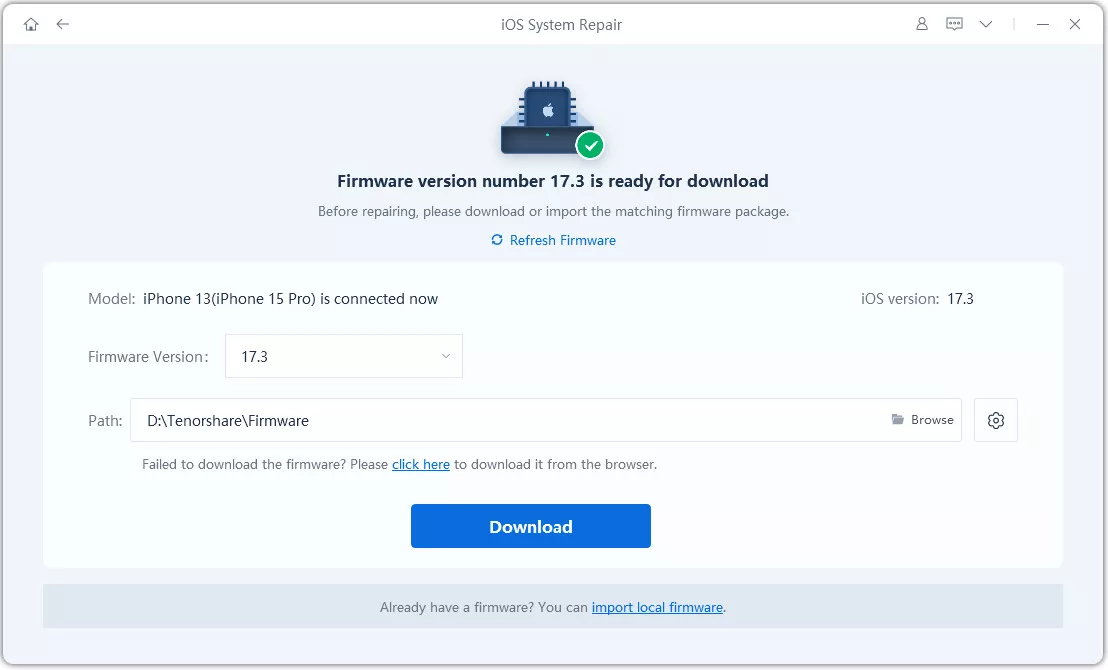
After selecting from the above options the new page will give you an option to download the firmware. If you are ready for your repair. Click download and if the download fails you can download it by pressing the ‘click here’ options and ‘import the local file’ to the software.
Once it has been downloaded or imported, choose Start Standard Repair.
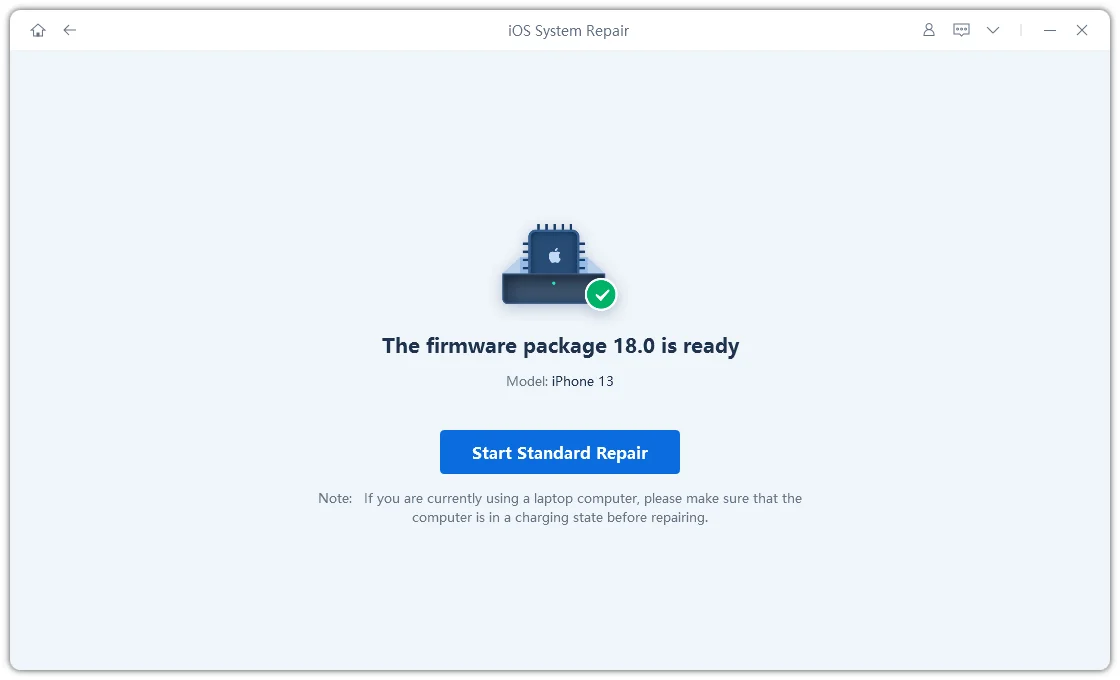
Wait for the setup to complete.
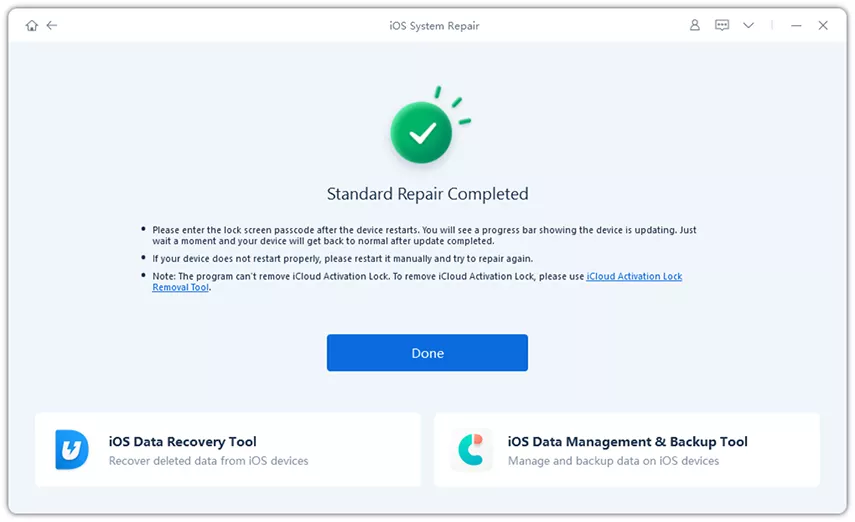
If the process is still unclear to you, then you can visit their website guide and follow the same instructions there as well.
Set up iCloud Shared Photo Library Again After Troubleshooting
When you’re done with fixing the issue, you can easily set up iCloud Shared Photo Library again. Here’s how you can do it in a few steps.
- Go to the Settings app on your iPhone.
Tap Photos in the options.
Tap Shared Library.
- Tap Get Started.
You can add participants by tapping on Add Participants to add people to the library (five people allowed). Tap Next and then tap Add Later.
- You can choose existing photos and videos from your personal library and paste them into the shared library. Tap Next when done.
- Tap Skip or Preview Shared Library to have a quick view of the content.
Tap Invite via Messages or tap Share Link for sharing methods.
- Select share photos from your camera Automatically or Manually.
Tap Done when you finish setting up your iCloud Shared Library.
Final Words
The Shared Photo Library is a new function to share photos and videos between iOS devices. We hope this guide helps you in getting access to shared albums on iPhone now. You could try a simpler and faster way using Reiboot if you are Unable to Join Shared Photos Library. This could really help you in fixing every iOS-related issue.